
Hello guys, this is an update from a very old project. I realized a never finished sharing the process of this amazing costume, so better late than never!
For the last part, I will go through the making of the top, Bottoms and cage train.
THE TOP
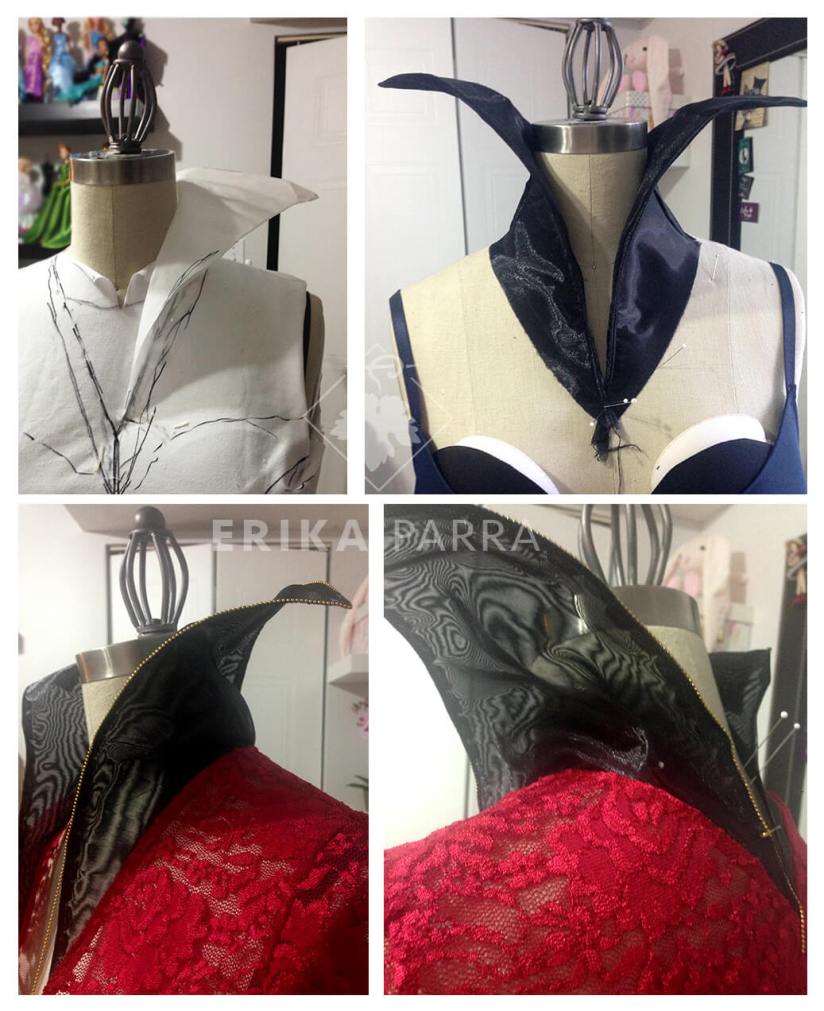
The top looked like a long sleeve top with puffy embroidered sleeves on top, a sort of elizabethan collar split in two (which is pretty similar to the collar style of all her other costumes) and a beautiful lettering of an I and an R connected by a heart.

I built a basic knit bodice pattern for the top as well as the puffy sleeves and built the collar on my mannequin using a draping technique to get a better proportion and shape.
The fabric I purchased as base for my bodice was a bit too bright so I tried to dye it in a burgundy red, you cannot really tell in the photo but in a full piece it did make a difference.
For the collar I draped it on my mannequin and used black organza for rigidity and also to give the transparency effect seen in a few images of her costume. I found a small rounded gold chain for the trim around the collar that I hand sew.
For the embroidery part, I considered hiring someone to do this but honestly after contacting 3-4 people I could not find anybody willing to do it. So, I found this great video as a reference of how to free hand embroidering on a sewing machine. This was a wild experience for me, I had to repeat this part twice, but I am really happy I found this technique that I also used for me sleeves details.

I used polyester organza backed with water soluble stabilizer and embroidered both pieces with gold thread (not real gold ;)). Then, I cut the pieces and then I hand embroidered the large back piece to my bodice and used zig-zag on the details for the sleeves.

THE BOTTOMS
So the bottoms are split in two parts: Leggings and Bloomers.
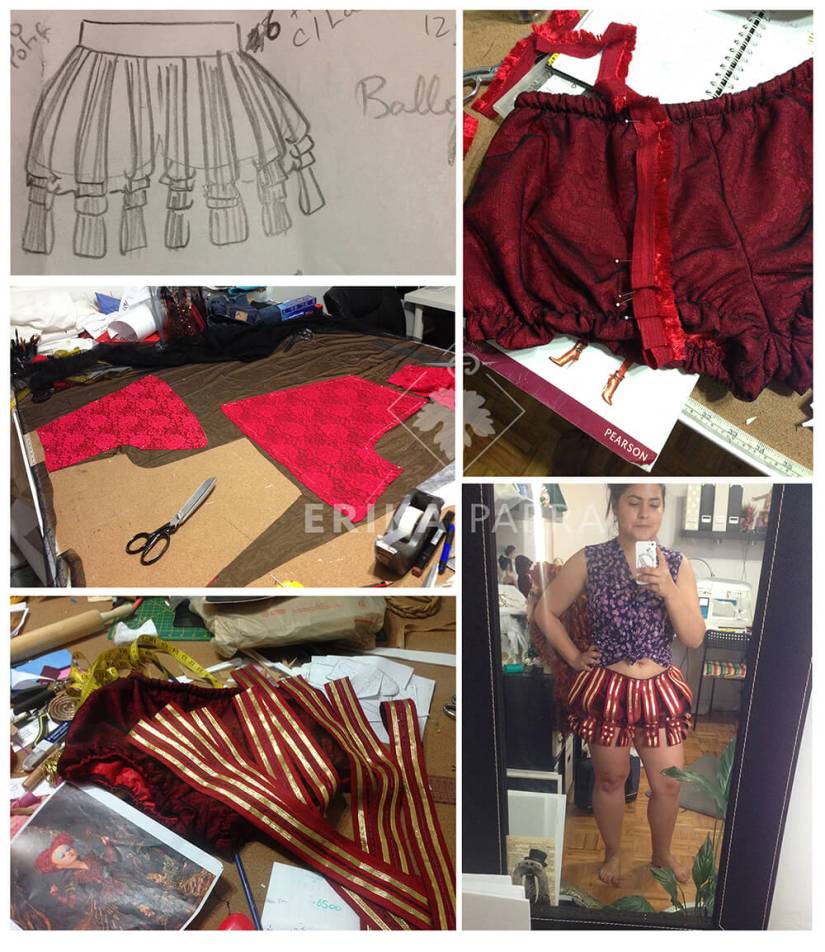
The Leggings were purchased and I worked on the side details. I first drew up the design based on the reference photos and doll too and used a gold cord that I hand stitched to create the loops on the center of the design.
Once that part was ready, I put a mesh as a base and sew the loops on it and then used various ribbons to finish up the details. The hard part was that once these pieces were finished, I had my awesome sister hand sewing them to the leggings while I was wearing them. That is a proof of how much i trust her!

Then, I created the pattern of the bloomers and used three layers to create the look of the original costume: The base was red taffeta, then I used the same floral lace fabric of the bodice and covered it with a black mesh.
I cut straps of red taffeta that I backed with black cotton fabric to create the base where I sew 1/8 inch burgundy satin ribbon and 1/2 inch gold ribbon. Then I stitched it to the pants.
The CAGE:
For the cage I used the same principle as in the bloomers. In this case, I used the same 1/8 inch burgundy satin ribbon and a 5/8 Gold ribbon for the center.
I don’t have a photo of this part of the process, but to be able to keep the horizontal straps rigid, I used plastic corset boning.

So here is a photo of the ensemble before I was done with the corset, but I was so happy with it!!!

If you have any questions, let me know!!
Until next time!


excelente trabajo felicitaciones, eres una gran diseñadora.
Muchas gracias por tu apoyo!!❤️
Amazing. Everything you do is so inspiring. The love, passion and attention to detail has no parallel.
Great job !!